Please note you can only upload one document per assignment (unless otherwise stated)
Step 1: Login to your LMS.
Step 2: Scroll to the bottom of the page until you see the ''Assessments'' section.
Step 3: Click on the "Submit Assessment" button

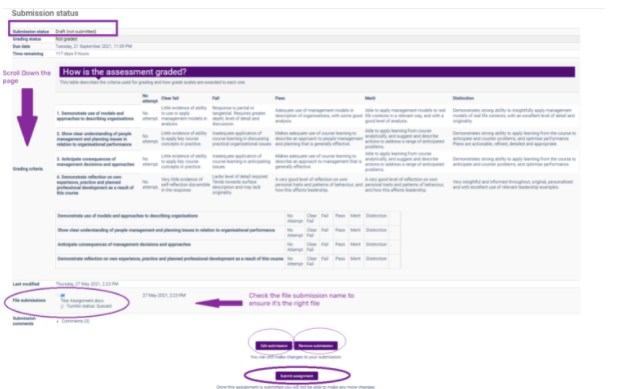
This will open a page called Submission Status. You will be able to see your upload, when it’s due and whether it’s been graded or not.
It also shows the marking rubric too so you have a clear understanding of what you will be graded on.
Step 4: Scroll to the bottom of the page to “Add Submission”
When you are doing this for the first time you will have to accept the Terms and Conditions
Step 5: Drag and drop your submission into the field, or search for file by clicking the Doc+ sign in the left hand corner of the File Submissions Block:
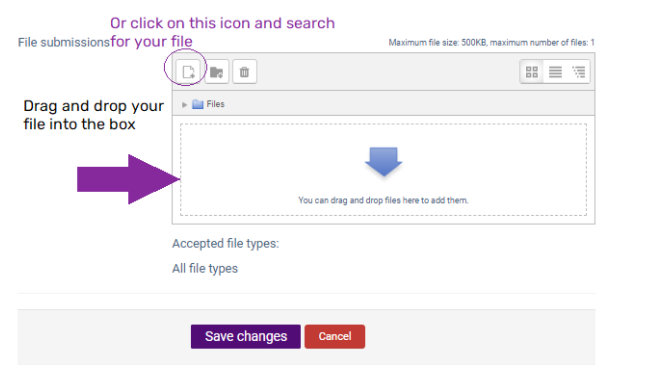
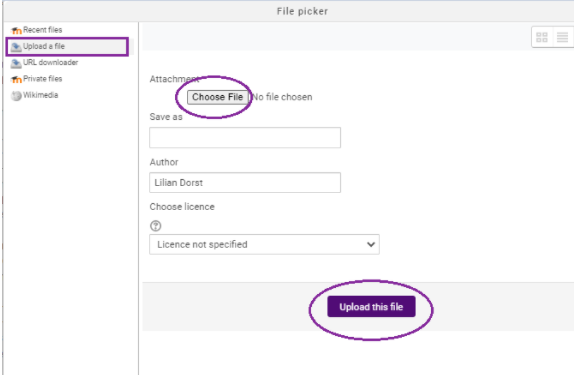
If you chose to search for your file on your computer, it will open a pop up box for you to look for it. Click on 'Choose File' and find your assignment in your computer and press Upload this file. There is no need to fill any other field.
Step 6: Press Save Changes
This will lead you back to your Submission Status page, however now you see in submission status “Draft (not submitted)". This is to ensure that you have a final check of your document.
You still have time to remove or edit the submission before you press submit.
Step 7: Have you checked all and are ready to Submit? If so, please scroll down and press Submit Assignment.
Step 8: Tick the box to state it is your own original work and press Continue
When you go back to your course page you should now see that that the status as submitted and the date of the submission.
